
Print Finishing
Complete post-processing guide: sanding, chemical smoothing, filling, and painting to achieve clean, finished parts.
⏱ Estimated time: 8 min
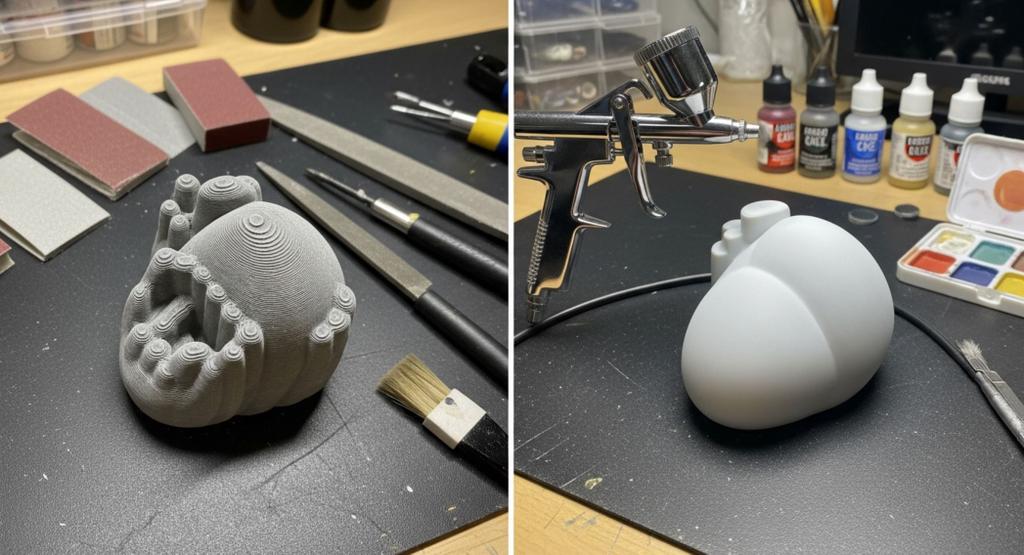
Procedure
🪨 Mechanical Grinding and Polishing
Gradual sanding from coarse (120) to fine (2000), with wet sanding starting at grit 400. The result is a smooth to glossy surface with no visible layers. Suitable for all materials.
🧰 What You'll Need
Grinding and Polishing Equipment
Difficulty: Beginner
Basic mechanical sanding kit – available at any hobby store.
- Sandpaper
- 120 / 240 / 400 / 600 / 1000 / 2000
- Technology
- Wet sanding from grit 400
- Final polishing
- Polishing paste for plastics (Quixx)
- Protection
- Respirator FFP2/FFP3 + protective glasses
Sanding block or cork pad: For flat surfaces – prevents paper bowing and uneven sanding.
Bowl with lukewarm water + detergent: Reduces surface tension - water washes away sanded plastic better.
Cotton cloth: For final polishing with paste – synthetics can scratch.
📋 Step-by-Step Workflow
Grinding Procedure – 5 Steps
💡 Tip: For colored filaments, heat with a gun - the color will "pull out"
With each grit size, you must completely remove the scratches left by the previous one; otherwise, they will still be visible under the gloss.
Step 1 - Rough comparison (120): Remove seams (z-seam) and remnants of supports. Sand until the surface is uniformly matte.
Step 2 – Gradual Refinement (240 → 400): Each grain must completely remove the grooves after the previous one.
Step 3 – Wet Sanding (400 → 2000): Soak both the paper and the model. Water washes away the plastic and prevents lint from friction.
Step 4 – Final Polishing: After 2000 grit, use a cotton cloth and polishing paste. Circular movements = high shine.
Step 5 – Check: Clean the IPA - you will see the real condition of the surface without dust.
⚗️ Chemical smoothing fumes
Acetone vapors (ABS/ASA) or IPA vapors (PVB/Polysmooth) chemically dissolve the surface to create a mirror-smooth finish. This is the most effective method—but it requires precision and safety precautions.
🧰 What You'll Need
Equipment for chemical smoothing
Difficulty: Expert — for ABS/ASA or PVB only
An airtight container + the correct solvent. There’s no room for improvisation here.
- Solvent (ABS/ASA)
- Technical acetone
- Solvent (PVB)
- Isopropylalkohol (IPA) 99 %
- Container
- Glass or metal, hermetic
- Protection
- Nitrile gloves + mask with organic filter
Paper towels + clips: To line the walls of the container - moisten it, it must not run.
Aluminum foil or glass: The mat for the model – it must not be porous.
📋 Step-by-Step Workflow
Chemical Skin Resurfacing Procedure – 5 Steps
⚠️ Do not extend the exposure - overexposure will dissolve the details without a trace
Check the process every 5 minutes. As soon as the layers disappear, remove the model immediately.
Step 1 – Chamber Preparation: Line the sides of the container with damp cloths. It must not run - only moistened.
Step 2 - Place the model: Model on a non-porous mat in the center of the container. It must not touch the towels.
Step 3 – Exposure: Close the container. Check every 5 min. Is the surface shiny? Remove immediately.
Step 4 – Curing: The model will be soft and sticky for 24-48 h. Do not touch it - you will leave prints.
Step 5 - Neutralization: Done when the model stops smelling of solvent.
🖌️ Sealants and Fillers (Filler & Primer)
Spray-on filler fills microscopic gaps between layers. Two-component filler smooths out deep grooves left by supports. The foundation for a professional paint job.
🧰 What You'll Need
Caulking Equipment
Difficulty: Advanced
Spray putty (aerosol) is the foundation. Use two-part putty only for deep scratches.
- Spray Sealant
- Spray-on primer filler (aerosol)
- Scratch Filler
- Two-component polyester (car sealant)
- Interlayer Grinding
- Grit 320–600
- Tip
- Auto-filler is cheaper than modeling spray
Modeling spatula: For manual application of two-component putty in deep grooves.
Abrasive fleece: For fine alignment of the filler without excessive sanding of the plastic.
📋 Step-by-Step Workflow
Sealing and Filling Procedure – 5 Steps
💡 Auto-filler is cheaper and has a higher filling capacity than modeling spray
The goal is to even out the color and smooth the surface before the final coat of paint.
Step 1 - Degreasing: Wash with spring water or IPA. The sealant does not stick to grease.
Step 2 - Rough caulking: Fill the deep grooves along the supports with a two-component putty. Let it dry for 30 minutes, then sand it flat.
Step 3 – First Filler Layer: Apply the spray sealant in 2-3 thin layers. It fills microscopic gaps.
Step 4 - Control Grinding (400): The filler will remain in the depressions, the bumps will be ground away. You can see the contrast = good.
Step 5 – Final Primer: A final coat of smooth base coat will unify the color before painting.
🎨 Varnishing and Final Coloring
Acrylic spray or airbrush paints, masking techniques, washes for depth, and a protective clear coat. Professional results within everyone’s reach.
🧰 What You'll Need
Painting Equipment
Difficulty: Advanced
Key principle: multiple thin layers > one thick layer. Always.
- Colors
- Acrylic spray or Airbrush
- Camouflage
- Paper tape 0.24-0.71 in (yellow)
- Clear Coat
- Matte / satin / glossy
- Paint Drying
- 12-24 h before applying the varnish
Quality brushes (synthetic hair): For detailed painting and wash technique.
Test piece: Always test the combination of paint and varnish of different brands - they can react to each other.
📋 Step-by-Step Workflow
Painting Process – 5 Steps
💡 Always test different brands of paints and varnishes beforehand on a waste piece
Dust in fresh paint = the biggest enemy of a good finish. Work in a clean area.
Step 1 – Masking: Press the edges of the tape firmly with your fingernail so that the paint does not bleed through.
Step 2 – Base color (mist coats): Very thin layers - never try to "pour" the color in one layer.
Step 3 – Wash technique: The very thinned black color will flow into the joints and create depth and realism.
Step 4 – Clear Coat (protective varnish): Apply after 12-24 hours of paint drying. Protects against UV, sweat and scratches.
Step 5 – Polishing the paint: For extreme shine, sand with 3000 grit paper after a week of aging and polish with paste.
⚡ A Quick Overview of Methods
Which surface treatment method is right for you? It depends on the material, the tool, and the desired result.
🔎 Method → Material → Result
Comparison of Surface Treatment Methods
Combine methods - sanding → sealing → painting = professional result
Every method has its place. You don't have to choose just one—combine them.
- Grinding
- All Materials | Beginner
- Acetone vapors
- Only ABS/ASA or PVB | Expert
- Filling + Primer
- All Materials | Advanced
- Painting
- All Materials | Advanced
💡 Best combination: Sanding (120→600) → Primer Filler → Control Sanding (400) → Color → Clear Coat.