
Solving Common Problems
Diagnostic guide covering stringing, warping, under-extrusion, clogged nozzles, first-layer adhesion and ghosting — causes, fixes, and quick tips.
⏱ Estimated time: 13 min
Procedure
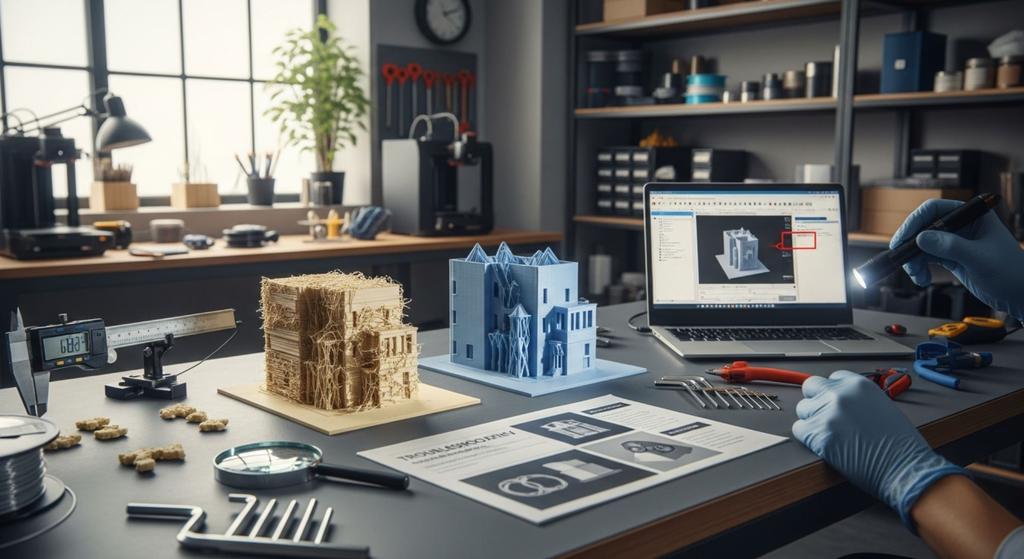
Before You Start Troubleshooting: A Quick Diagnostic Procedure
If you change five things at once, you won't be able to tell what actually caused the problem. The fastest way to fix it is to follow a disciplined approach, starting with the least expensive troubleshooting steps and working your way up to hardware interventions.
🧭 An approach that makes sense almost every time
Diagnosis in Five Steps
First drive pad and filament, and then firmware and mechanical interventions
Most problems occur in a few recurring areas: the build plate, the first layer, damp filament, extrusion, or overly aggressive print settings.
1. Stop and do nothing randomly: Use this recommendation while configuring your print.
2. Check out the cheapest items: The cleanliness of the substrate, the first layer, the temperature, the profile of the material and the condition of the coil. These things make most of the problem.
3. Change only one variable: Temperature, retraction, speed or flow. Never all at once.
4. Test on a small model: A calibration cube, temperature tower or small functional test is better than immediately spoiling an eight-hour print.
5. Then check hardware: If the problem persists even after reasonable adjustments to temperature, speed, and material, it's time to stop fine-tuning and check the nozzle, PTFE tube, belts, bearings, or fans.
🕸️ Stringing (spiderwebs)
Thin strands of plastic run between the sections of the model. The surface looks "peeled" and needs to be repaired by hand. Cause: too high a temperature or insufficient retraction.
🔍 Symptoms and Causes
⚠️ What stringing looks like and what causes it
Quick fix: reduce temperature by 41 °F + increase retraction by 0.02 in
Thin strands or webs of plastic between the separate parts of the model. The surface looks "peeled."
⚠️ Nozzle temperature too high: The plastic is too liquid and flows out even when crossing without extrusion.
⚠️ Insufficient retraction: The filament is not pulled back before crossing – it flows freely.
⚠️ Slow crossing movement: The nozzle has more time to flow out at a slow travel speed.
⚠️ Wet filament: Absorbed moisture causes bubbling and overpressure in the nozzle.
✅ Step-by-Step Solution
✅ Stringing Repair Procedure
Temperature tower test = fastest diagnostics
Proceed from the simplest repair to more advanced calibration.
- Retraction (Bowden)
- 0.2–0.28 in | 2.4–3.1 in/s
- Retraction (Direct Drive)
- 0.04–0.12 in | 1.6–2.4 in/s
- Travel Speed
- 5.9–7.9 in/s
- Nozzle temperature
- Reduce by 41 - 50 °F
- Drying the Filament
- PLA 113 °F/4–6 h | PETG 149 °F/6–8 h
✅ Step 1 - Temperature: Reduce nozzle temperature by 41 - 50 °F. Print a temperature tower for diagnostics.
✅ Step 2 - Retraction: Increase retraction distance and retraction speed according to extruder type.
✅ Step 3 – Travel: Increase Travel Speed to 5.9-7.9in/s and turn on "Avoid crossing perimeters".
✅ Step 4 – Filament: Dry the filament at the recommended temperature - moisture is the most common cause with PETG.
✅ Step 5 – Pressure Advance: Calibrate Pressure Advance (Klipper) or Linear Advance (Marlin) for consistent flow.
🌀 Warping (corner distortion)
The corners or the entire bottom surface of the model lift off the build plate. The model cracks or comes completely loose. This is most common with ABS, ASA, and large PLA models without brims.
🔍 Symptoms and Causes
⚠️ Why does the model lift off the mat?
Quick fix: IPA + Brim 0.39 in - solves 80% of cases
The corners or the entire bottom surface lift off the base. The model may crack or come apart completely.
⚠️ Quick cooling: Shrinkage of the plastic causes internal tension to pull the corners up.
⚠️ Cold or dirty mat: Hand oil, dust or adhesive residue reduce adhesion.
⚠️ A closed chamber is missing: ABS and ASA require a stable chamber temperature – drafts are the enemy.
⚠️ Small contact area: Slim or tall models have little material on the mat.
✅ Step-by-Step Solution
✅ Steps to Fix Warping
ABS without an enclosure very often leads to warping.
The solution depends on the material. ABS/ASA requires an enclosure, while PLA/PETG only needs a brim and a clean build plate.
- PLA – pad
- 131 - 149 °F
- PETG – Spacer
- 176 - 185 °F
- ABS – washer
- 212 - 230 °F + enclosure
- Brim
- 0.31–0.59 in (nebo Mouse Ears na rohy)
- Cooling, 1st layer
- 0-30% (first 3-5 layers)
✅ Step 1 - Clean pad: Clean the IPA 99% and let it dry. Do not touch the pad with your fingers.
✅ Step 2 – Brim or Mouse Ears: Add 0.39-0.59 in Brim in the slicer. For small models, Mouse Ears on the horns are enough.
✅ Step 3 – Pad temperature: Increase the temperature of the pad according to the material. With ABS, the risk of warping is significantly higher below 212 °F.
✅ Step 4 – Eliminate drafts: Close the windows, turn off the air conditioner. For ABS/ASA, build an enclosure out of cardboard or buy a commercial one.
✅ Step 5 – Adhesive preparation: Apply Magigoo, ABS Juice (ABS in Acetone) or 3DLAC for extra grip.
🔲 Under-extrusion (insufficient extrusion)
There are gaps, holes, or thin spots in the walls and layers. The top surfaces are not closed. The model is weak, and the surface appears porous or translucent.
🔍 Symptoms and Causes
⚠️ Why does the model have holes and gaps in its layers?
Quick fix: +41 °F temperature + -20% speed
Gaps between extrusion lines, holes in the top surfaces, transparent or porous walls.
⚠️ Partially clogged nozzle: The carbonized material restricts flow without completely clogging.
⚠️ Low nozzle temperature: The material is not extruded smoothly - the viscosity is too high.
⚠️ Printing too fast: The extruder does not have time to deliver enough material at high speed.
⚠️ Badly calibrated E-steps: The extruder sends less material than the slicer expects.
✅ Step-by-Step Solution
✅ Steps to Fix Under-Extrusion
E-steps calibration = the basis of accurate printing
Start with the basic settings in the slicer, then move on to hardware calibration.
- Flow Rate
- Increase by 5% (105%)
- Temperature
- Increase by 41 °F
- Speed
- Reduce by 20-30%
- E-steps Calibration
- Extrude 3.94 in, measure the fact
- Top Layers
- Min. 4–6 layers or 0.03–0.04 in
✅ Step 1 - Cold Pull: Clean the nozzle with a Cold Pull - even a partial blockage significantly reduces the flow.
✅ Step 2 – Temperature + speed: Increase the temperature by 41 °F and reduce the print speed by 20-30%. Immediate improvement.
✅ Step 3 – Flow Rate: Increase the Flow Rate in the material settings to 105% as a temporary solution.
✅ Step 4 – E-steps calibration: Mark the filament 3.94 in from the extruder, extrude 3.94 in and measure the actual distance.
✅ Step 5 – PTFE tube: Check the PTFE tube at the nozzle - the gap causes deposits and reduces flow.
🚫 Clogged nozzle
The extruder is not extruding filament or is stuttering and skipping. The nozzle does not extrude material even when moved manually. Clogging is the most common mechanical failure in FDM printers.
🔍 Symptoms and Causes
⚠️ Why Does the Nozzle Get Clogged?
Recommended option
The printer is not extruding filament, or the extruder is jerking. The nozzle does not respond even when moved manually.
⚠️ Carbonized material: Overheated or burnt filament leaves deposits blocking flow.
⚠️ Transition of materials without cleaning: The remains of the previous material react with the new one at a different temperature.
⚠️ Heat creep: The heat climbs higher into the cold zone, where the filament prematurely softens and sticks.
⚠️ Damp or dirty filament: Foreign particles or water vapor bubbles form deposits inside the nozzle.
✅ Cold Pull – Step-by-Step Guide
✅ Cold Pull – the most effective method for cleaning the nozzle
Recommended option
Cold Pull mechanically removes all deposits from the nozzle without the use of chemicals.
- Warm-up
- 446 - 482 °F
- Cooling (PLA)
- 194 °F
- Cooling (PETG/ABS)
- 248 - 284 °F
- Number of repetitions
- 3-5x until the tip is clean
- Nozzle (spare)
- 20 – 200 Kč / E3D V6 / hardened steel
✅ Step 1 - Warm up: Heat the nozzle to 446 - 482 °F and manually push the filament until it flows clean.
✅ Step 2 – Cool: Cool the nozzle to 194 °F (PLA) or 248 - 284 °F (PETG/ABS). Do not press on the filament.
✅ Step 3 – Pull out: Pull the filament out with a quick pull. An imprint of the nozzle passage must be visible on the tip.
✅ Step 4 – Repeat: Repeat 3-5x until the extracted tip is clean and bright with no dark deposits.
✅ Step 5 – Replace the nozzle: If Cold Pull does not help, replace the nozzle. It is a consumable part - replacement takes 5 minutes.
📐 Poor adhesion of the first layer
The model does not adhere to the build plate; the first layer is transparent or sinks into the build plate. The corners lift within the first few minutes. Cause: incorrect Z-offset or a dirty build plate.
🔍 Symptoms and Causes
⚠️ Why Doesn't the First Layer Stick to the Mat?
Quick fix: IPA + reduce Z-offset by 0–0 in
The model doesn't stick; the first layer is transparent or sinks into the substrate. Or, conversely, the first layers are smudged (Elephant Foot).
⚠️ Bad Z-offset: The nozzle is too far (does not stick) or too close (Elephant Foot / digs).
⚠️ Soiled pad: Oil from your hands, dust or adhesive residues significantly reduce adhesion.
⚠️ Uneven pad calibration: Without Mesh Bed Leveling, the far points of the bed are at a different height.
⚠️ Incorrect mat temperature: Cold pad = zero grip. Each material needs a different temperature.
✅ Step-by-Step Solution
✅ Procedure for Repairing Adhesion of the First Layer
Always calibrate the Z-offset at operating temperature!
The right first layer is the foundation of a successful print. Take the time to calibrate—it's worth it.
- PLA – pad
- 131 - 149 °F
- PETG – pad
- 176 - 185 °F
- ABS – washer
- 212 - 230 °F
- Speed of the first layer
- 0.6-1.0 in/s (50% of main speed)
- Temperature of the first layer
- +41 - 50 °F compared to the rest of the print
✅ Step 1 - IPA cleaning: Clean the IPA 99% pad and let it dry. Do not touch with your fingers.
✅ Step 2 – Z-offset calibration: Calibrate Z-offset at operating temperature. Correct gap = ~0–0.01 in (paper test).
✅ Step 3 – Mesh Bed Leveling: Start automatic calibration of the entire pad area (BL-Touch, CR Touch, Probe).
✅ Step 4 - The right temperature: Set the correct pad temperature for the material. Cold pad = debonding.
✅ Step 5 – Adhesive preparation: Use Magigoo, glue stick or hairspray for a smooth base.
🌊 Ghosting / Ringing (waves on the walls)
Repeating waves or "ghosts" are visible on vertical walls. They appear as distinct geometric patterns in the direction of the axis's movement. Cause: mechanical vibrations during rapid movements.
🔍 Symptoms and Causes
⚠️ Why are there waves and repeating patterns on the walls of the model?
Quick fix: Acceleration to 39.4-59.1 in/s² + Jerk to 5
Rhythmic waves and recurring distortions on vertical walls behind corners and letters. This is known as "ringing" or "ghosting."
⚠️ Acceleration too high: Rapid changes in the direction of movement cause vibrations of the frame and the print head.
⚠️ Allowed belts: Enabled belt X or Y vibrates like a string - the vibration is transferred to the print.
⚠️ Too high Jerk / Junction Deviation: A large jump in speed in corners causes shocks and vibrations.
⚠️ Heavy or loose print head: A large hotend or direct extruder intensifies vibrations during fast movements.
✅ Step-by-Step Solution
✅ Steps to Fix Ghosting / Ringing
Input Shaping (Klipper) = 100% eliminace ghostingu
Start by reducing the acceleration (immediate fix), then fine-tune the mechanics and consider Input Shaping.
- Acceleration
- Reduce by 30-50% (eg 3000 → 59.1 in/s²)
- Jerk (Marlin)
- 0.2–0.3 in/s
- Junction Deviation (Marlin)
- 0.04–0.08
- Belts – Frequency
- ~100–120 Hz (like a bass guitar)
- Input Shaping (Klipper)
- ADXL345 accelerometer - full elimination
✅ Step 1 - Reduce Acceleration: Reduce Acceleration by 30-50%. Immediate visible improvement without hardware intervention.
✅ Step 2 - Tighten the belts: A properly tensioned belt "sounds" like a bass guitar (~100-120 Hz) when tapped.
✅ Step 3 – Reduce Jerk / Junction Deviation: Reduce Jerk to 0.2 in/s (Marlin) or Junction Deviation to 0.04-0.08.
✅ Step 4 - Tighten the screws: Check and tighten all screws of the frame, linear carriages and bearings.
✅ Step 5 – Input Shaping (Klipper): The most efficient solution: the ADXL345 accelerometer measures the resonance of the printer and the firmware compensates for it.
⚡ Quick Diagnostic Overview
Not sure what's wrong with your printer? Compare the symptoms to identify the problem. Or use the interactive Diagnostic Guide in the app.
🔎 Symptom → Problem → Section
How to Quickly Identify a Problem Based on the Appearance of the Printout
Diagnostic guide → interactive version in the application menu
Quick Diagnostic Chart: symptom → likely problem → section in this guide.
- Cobwebs between the panels
- → Step 1: Stringing
- Rising Corners
- → Step 2: Warping
- Holes in the walls
- → Step 3: Under-extrusion
- No extrusion / clicking
- See recommended range for this material.
- The first layer doesn't stick
- → Step 5: Adhesion
- Waves on the Walls
- → Step 6: Ghosting
Tip For interactive guides with branching questions, use the "Diagnostic guide" section in the application menu.
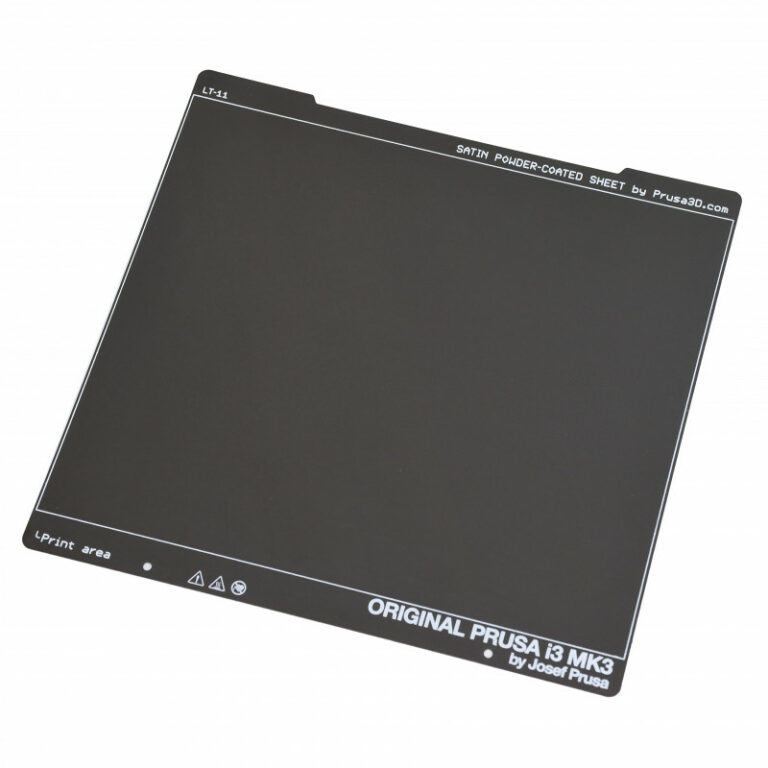
I don't know which printing mat to choose
Quick mat selection by material (verified sources)
Below are the types of pads and their uses, according to the official documentation from Prusa and Bambu Lab. No guesswork: just the recommendations provided by the manufacturers for real-world combinations of materials and surfaces.
- Smooth PEI (smooth)
- Strong adhesion to most filaments; PETG/TPU can hold too much and a separation layer is suitable.
- Textured PEI (textured)
- Recommended for PETG, CPE and TPU/Flex; easier to remove the print than on smooth PEI.
- Satin PEI
- A compromise between smooth and textured; universal use for a wide range of common filaments.
- PA Nylon Sheet
- Special surface primarily for polyamides (Nylon) where adhesion to standard PEI is weak.
- PP sheet
- A specialist underlay for polypropylene (PP) where other surfaces often fail.
- HighTemp Sheet
- For high-temp materials (PEEK/PEEK-CF/PEI/PEKK/PPSU); not primarily intended for PLA/PETG.
Using a separation layer (verified): Prusa states that PETG, ASA, ABS and PC Blend may require a separation layer (eg glue stick) to prevent surface damage.
Cleaning and maintenance (verified): Bambu Lab recommends regular cleaning with hot water and soap; acetone on the surface of the mat is not recommended.
Photos of the mats (official): Smooth: | Textured: | Satin:
Verified Sources: Prusa Flexible steel sheets: | Bambu Lab Filament guide (Build Plate Settings):


When to Stop Trying to Fix It and Just Replace the Part
Not everything needs to be solved by tinkering further in the slicer. Some problems are simply caused by a worn nozzle, a faulty PTFE tube, or a worn-out part that takes more time to repair than it would to replace with a new one.
🔧 Typical situations where replacement makes sense
How to Tell When the Problem Isn't Just a Setting Issue
A recurring problem across multiple profiles and models often indicates hardware.
If the same problem persists even after making reasonable adjustments to temperature, speed, and material, it's time to stop fine-tuning and check the consumables or mechanical parts.
Nozzle: If, even after a cold pull, the extrusion is still angry, the layer is inconsistent, or the printer frequently clogs, replacing the nozzle is cheaper than additional hours of testing.
PTFE tube and couplers: Deformation, looseness, or scorching around the hotend often cause intermittent feeding problems and under-extrusion.
Bed or PEI surface: If even after thorough cleaning, the first layer no longer holds where it used to, the surface may simply be tired or damaged.
Fans and mechanics: Unusual noise, vibrations, inconsistent cooling, or recurring ghosting are often not a software issue but a sign that the printer needs servicing.